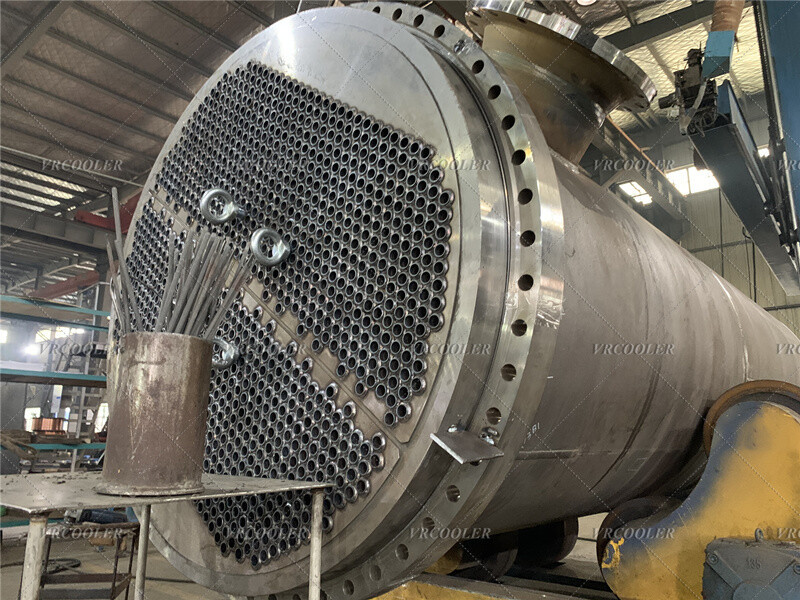
Making a shell and tube heat exchanger involves several steps and requires precision engineering and fabrication skills. Here is a general overview of the process:
1. Design and Planning:
Determine the specific requirements of the heat exchanger based on the intended application, such as heat transfer capacity, fluid properties, operating pressures, and temperatures.
Use engineering software or calculations to design the heat exchanger, including determining the size and layout of the shell, tubes, baffles, and other components.
2. Material Selection:
Select appropriate materials for the shell, tubes, tubesheets, baffles, and other parts based on factors such as corrosion resistance, compatibility with the fluids, mechanical strength, and thermal conductivity.
Common materials for shell and tube heat exchangers include carbon steel, stainless steel, copper, and various alloys.
3. Tube Fabrication:
Cut the tubes to the required length using a tube cutter or saw.
If necessary, perform processes such as bending or expanding the tubes to fit the design requirements.
Clean the tubes to remove any debris or contaminants.
4. Shell Fabrication:
Fabricate the shell by welding or forming metal sheets into a cylindrical or rectangular shape.
Ensure that the shell is properly sized and has the required thickness to withstand the operating pressures and temperatures.
Install nozzles and flanges for fluid inlet and outlet connections.
5. Tubesheet Fabrication:
Fabricate the tubesheets, which are plates that hold the tubes in place at each end of the heat exchanger.
Drill holes in the tubesheets to match the diameter and spacing of the tubes.
Ensure that the tubesheets are flat and have the correct dimensions.
6. Assembly:
Insert the tubes into the holes in the tubesheets and secure them using welding, brazing, or mechanical expansion.
Install baffles inside the shell to direct the flow of fluid and enhance heat transfer.
Assemble the shell and tubes into a complete unit, ensuring proper alignment and tight connections.
7. Testing and Inspection:
Perform pressure tests to ensure that the heat exchanger is leak-tight and can withstand the operating pressures.
Conduct visual inspections and non-destructive testing methods such as ultrasonic testing or radiographic inspection to check for any defects or flaws.
Test the heat transfer performance of the heat exchanger by passing fluids through it and measuring the temperature changes.
8. Finishing and Painting:
Clean and finish the surface of the heat exchanger to protect it from corrosion and improve its appearance.
Apply paint or other coatings as required to provide additional protection.
Making a shell and tube heat exchanger is a complex process that requires expertise in welding, fabrication, and engineering. It is often best left to professional manufacturers or experienced fabricators to ensure a high-quality and reliable product.


